When summer settles over Skokie, a dependable cooling system is more than a luxury. It is a daily essential that keeps indoor humidity under control, preserves comfort through heat waves, and protects finishes and furnishings from excess moisture. If you want your air conditioner to deliver steady performance all season long, follow a clear set of steps that prevent minor issues from turning into major disruptions. A great starting point is to make time for routine air conditioning maintenance so your system is inspected and tuned before outdoor temperatures climb.
What follows is a structured, step-by-step process that you can use every year. Some steps are perfect for homeowners, while others are best handled by professionals with specialized tools. Together, they ensure ample airflow, proper drainage, clean heat-transfer surfaces, and safe, reliable electrical operation.
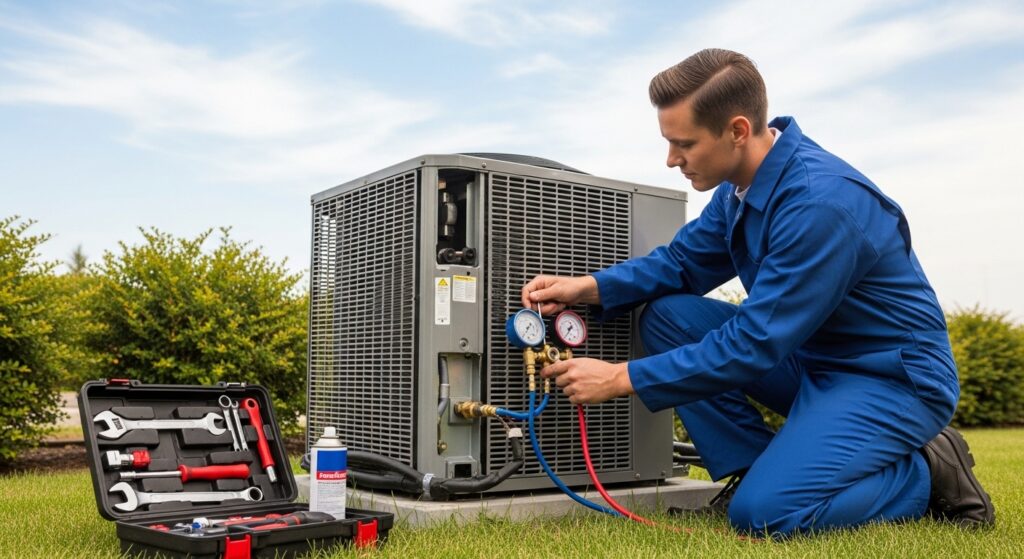
Step 1: Prepare the Outdoor Unit
Begin with a visual inspection. Confirm the condenser cabinet is level and that winter frost heave has not tilted the pad. A tilting unit can stress refrigerant lines and increase compressor wear. Clear at least two feet of space around the cabinet by trimming shrubs and moving yard equipment. Remove leaves, twigs, and cottonwood fluff from the coil surface. If needed, gently rinse from the inside out with low-pressure water to lift dirt without bending fins. Do not use a pressure washer.
Step 2: Restore Indoor Airflow
Inside, replace the air filter so your blower can move the correct volume of air. Check the size and airflow rating printed on the filter frame to ensure compatibility. Vacuum return grilles and supply registers to remove dust and pet hair, and confirm furniture or rugs are not blocking vents. In multi-level homes, verify that return pathways exist for upstairs rooms; closed doors without adequate undercuts can starve the system and reduce cooling performance.
Step 3: Verify Thermostat Settings
Program your thermostat to match your daily routine. Use modest setbacks rather than large swings to avoid excessive reheating or recooling. Make sure the thermostat is away from direct sunlight or heat sources that could skew readings. If you use batteries, replace them at the start of the season. For older mechanical thermostats, check that the device is level so its internal components operate correctly.
Step 4: Check Condensate Management
Cooling removes moisture from indoor air, and that water must go somewhere. Inspect the condensate drain line and trap for clogs or algae. Confirm that the trap contains water to prevent air from moving through the drain and bringing odors into the home. If you have an auxiliary drain pan or a float switch, test it carefully to ensure it shuts the system off when water rises.
Step 5: Establish a Performance Baseline
After a short run on a warm day, measure the temperature at a central return and the nearest supply. A difference of roughly 15–20°F suggests healthy heat exchange. If your readings are low, begin with airflow checks. Confirm the filter is new, vents are open, and returns are clear. If airflow is not the issue, it may be time to consult a professional to evaluate refrigerant charge and coil condition.
Step 6: Protect Electrical Integrity
Electrical reliability underpins every other step. Listen during startup for chattering or humming that suggests contactor or capacitor trouble. Make sure the outdoor disconnect is secure and dry, and that the circuit breaker is labeled and accessible. If you suspect electrical issues, do not open panels or attempt repairs; call a qualified technician to test components safely.
Step 7: Clean and Inspect Coils
Heat exchange happens at two coils: the indoor evaporator and the outdoor condenser. Dust, biofilm, and grime insulate these surfaces and reduce capacity. The outdoor coil can be lightly rinsed by homeowners, but deep cleaning—especially on the indoor evaporator—should be performed by a professional who can protect electronics, apply appropriate cleaners, and prevent condensate spills. Clean coils restore capacity and improve dehumidification, making your home feel cooler without aggressive thermostat settings.
Step 8: Balance Air and Manage Humidity
Once airflow is restored and coils are clean, fine-tune comfort. Adjust balancing dampers to direct more air to warm rooms, especially upper floors during afternoon hours. Keep bathroom and kitchen exhaust fans running long enough to remove moisture at the source. If your blower supports variable speeds, a professional can adjust settings to improve humidity control by allowing longer low-speed cycles.
Step 9: Document and Monitor
Track filter changes, temperature splits, and humidity levels. Record any noises, odors, or performance shifts. A simple notebook or notes app becomes an invaluable log across seasons, helping you and your technician spot trends like rising static pressure or declining capacity before they cause discomfort.
When a Professional Should Step In
While many steps are homeowner-friendly, certain tasks require tools and training: measuring superheat and subcooling, verifying static pressure, cleaning the evaporator coil and blower wheel, checking electrical amperage and voltage, confirming refrigerant charge, and evaluating duct leakage. Attempting these without the right equipment can be unsafe and may lead to misdiagnosis. Scheduling professional air conditioning maintenance at least once per year aligns your efforts with expert testing and cleaning.
Common Pitfalls to Avoid
- Neglecting the filter. Even premium equipment underperforms with a clogged filter.
- Closing too many vents. Restricting airflow raises static pressure and can lead to coil icing.
- Skipping condensate checks. A clogged drain can cause water damage and promote microbial growth.
- Using high-pressure water on coils. Bent fins reduce airflow and capacity.
- Ignoring subtle changes. New noises or odors often herald larger issues.
Frequently Asked Questions
Q: How often should I complete these steps? A: Do a full review each spring, check filters monthly during the cooling season, and perform a light cleanup before fall.
Q: What temperature difference should I see between return and supply air? A: Typically 15–20°F under normal conditions. Smaller splits can indicate airflow or refrigerant problems.
Q: Is it worth upgrading my thermostat? A: Smart or programmable thermostats help maintain steady comfort and can coordinate better with variable-speed equipment.
Q: Should I cover the outdoor unit in winter? A: Use only a top cover to keep leaves out. Do not wrap the entire cabinet, which can trap moisture and attract rodents.
Q: Why does my home feel clammy even though the thermostat reading looks fine? A: Humidity control depends on airflow, coil cleanliness, and runtime. A professional can adjust blower settings or suggest improvements that increase dehumidification.
Q: Can I close vents to unused rooms? A: Avoid closing many vents. It is better to balance air carefully and focus on envelope improvements to reduce overall load.
Plan Your Next Step
With a clear sequence to follow, you can move confidently from preparation to performance checks and into fine-tuning. Tackle the homeowner-friendly steps, keep a record of what you find, and bring in a pro for deep cleaning, measurements, and repairs that require expertise. When you are ready to ensure everything is dialed in for the hottest days ahead, schedule professional air conditioning maintenance and enjoy an even, comfortable home throughout the Skokie summer.


