Practical AC Troubleshooting for Skokie Homeowners
Before you resign yourself to a sweltering afternoon, a structured troubleshooting process can reveal whether a simple fix will restore cooling or if it is time to call a professional. Skokie’s seasonal humidity and variable weather place unique demands on cooling systems, and many issues trace back to airflow, drainage, or electrical components that have worn down over time. If you need professional help at any point, do not hesitate to schedule expert air conditioning repair so a technician can diagnose and resolve the problem safely.
Safety comes first. If you smell burning, hear arcing, or notice repeated breaker trips, turn the system off. For ice on refrigerant lines or a frozen coil, switch the thermostat fan to On and let the system thaw. Document any error codes or unusual sounds to guide the diagnostic process.
Step 1: Confirm Thermostat and Power
- Mode and setpoint: Set the thermostat to Cool and Auto. Lower the setpoint several degrees below room temperature to call for cooling.
- Power switches: Confirm the furnace or air handler switch is On, and check the outdoor disconnect near the condenser.
- Batteries and wiring: Replace thermostat batteries if applicable. If recently installed, verify the thermostat is configured for your system type.
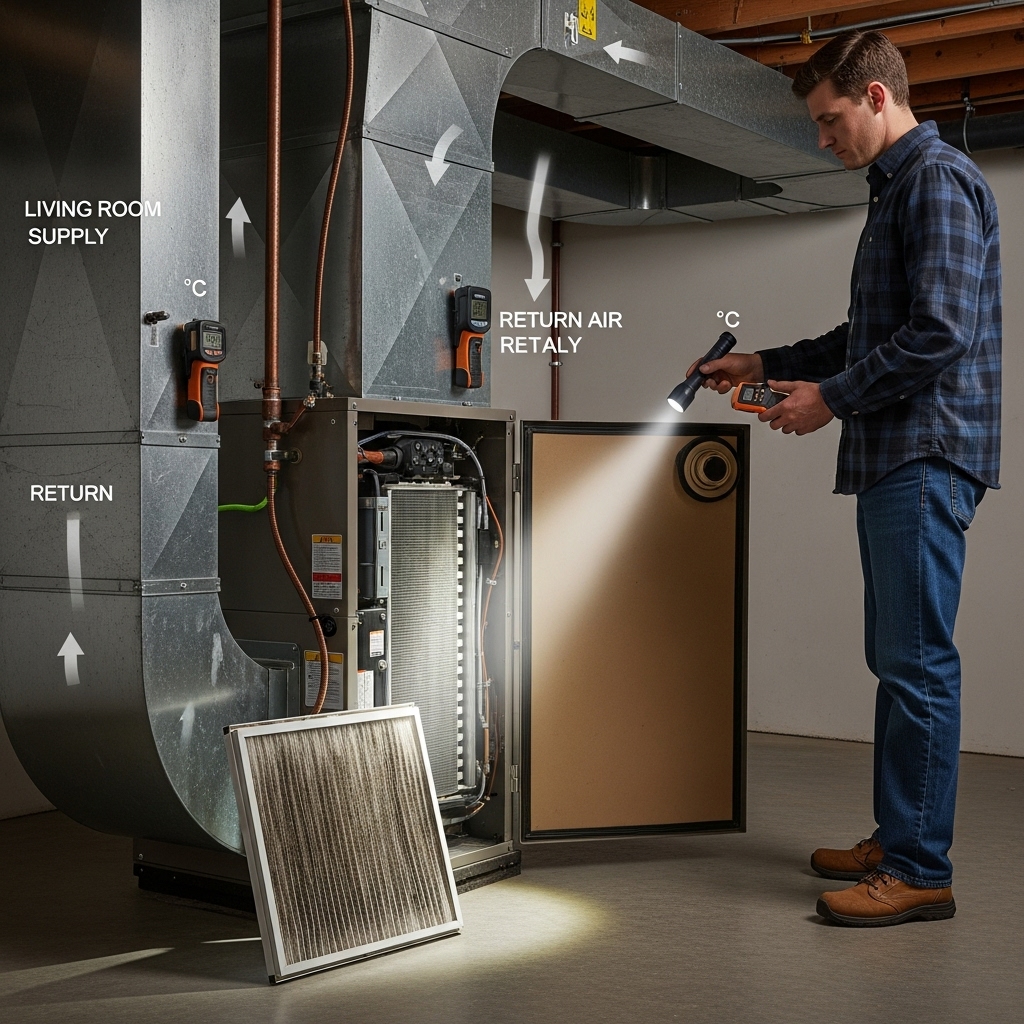
- Service door switch: Some furnaces have a safety switch that cuts power if the blower door is not fully seated.
Step 2: Restore Airflow
Restricted airflow is a leading cause of poor performance and freeze-ups. Replace a dirty filter, open all supply registers, and ensure return grilles are clear. Look for crushed flex duct in attics or basements and listen for hissing that might indicate leaks. Strong airflow protects your compressor and improves comfort across every room.
Step 3: Inspect Condensate Drainage
A clogged condensate line can trigger float switches, shutting down the system to prevent water damage. Check for standing water near the furnace or air handler. If you see an external cleanout, you may be able to clear minor clogs with a wet/dry vacuum at the outdoor drain termination. Always restore a trap or cleanout cap after clearing so the system does not draw unfiltered air.
Step 4: Outdoor Unit and Coil Condition
Debris around the condenser restricts airflow and raises head pressure. Clear leaves, cottonwood fluff, and vegetation to maintain at least 2 feet of clearance. If the coil is visibly dirty, a professional cleaning improves heat exchange significantly. Listen for the outdoor fan; if the compressor hums but the fan does not spin, a failed capacitor or motor may be to blame.
Step 5: Sounds, Smells, and Visual Clues
- Buzzing or humming at startup: Often a weak capacitor or pitted contactor.
- Squealing or grinding indoors: Potential blower motor or bearing issues.
- Clicking but no start: Thermostat relays may be engaging without the compressor receiving power.
- Musty odor: Condensate stagnation or microbial growth on the coil and drain pan.
Step 6: Temperature Split and Performance
With the system running, measure the temperature at a return grille and the nearest supply register using a simple thermometer. A typical cooling temperature split is roughly 16 to 22 degrees Fahrenheit under normal conditions. A very low split can indicate low refrigerant, a weak compressor, or poor airflow. A high split may suggest restricted airflow or a dirty coil.
Skokie-Specific Troubleshooting Considerations
Lake-effect humidity can make marginal airflow or a mildly dirty coil show up as major comfort problems. Older homes with additions or attic conversions often have uneven duct distribution that causes hot rooms. Use fans to assist circulation during troubleshooting and note which rooms lag behind; this information helps a technician diagnose duct balancing needs. Storms can cause brief brownouts that weaken start components; if your system struggles to start after a storm, a capacitor check is wise.
Thermostats and Controls
Smart thermostats offer helpful data, but incorrect configuration can hinder performance. Ensure the thermostat is set for your equipment type and stages. Verify that minimum run times and compressor delay settings are reasonable. If your thermostat loses power intermittently, a common wire issue or a tripped float switch could be the cause.
When DIY Stops and Pros Step In
Once basic checks are complete, specialized tests—such as measuring superheat and subcooling, assessing static pressure, and evaluating motor amperage—require tools and training. If the coil is frozen solid, if the outdoor unit short cycles, or if electrical components show overheating, turn the system off and arrange professional air conditioning repair. Quick action protects your compressor and helps avoid escalating damage.
Prevent Issues Before They Start
- Change filters on schedule; mark your calendar or set a phone reminder.
- Rinse debris from the outdoor coil gently with a garden hose at the start of the season.
- Treat condensate lines to discourage algae growth and blockages.
- Keep supply and return pathways clear throughout the home.
- Schedule a spring tune-up to catch weak components before peak heat.
Understanding Common Failures
Capacitors wear out gradually, often revealed by slow or failed startups. Contactors pit over time and can stick, causing the system to run when it should be off. Blower motors accumulate dust on the wheel, reducing airflow and stressing the compressor. Drain lines clog with algae during humid periods, especially in finished basements. Each of these failures has telltale signs that a trained technician can confirm quickly.
Ductwork and Room-by-Room Comfort
Uneven temperatures frequently point to duct issues. Look for closed dampers in branch lines, disconnected joints in unfinished spaces, and undersized return pathways in older homes. Balancing dampers, duct sealing, and modest design tweaks often solve hot-room complaints without replacing equipment. If rooms with large windows heat up in the afternoon, shading and reflective treatments help reduce load so your system can keep up.
Drainage, Leaks, and Water Safety
Even small leaks can damage finished areas. If you see water around the furnace or ceiling registers, shut the system off and address drainage before restarting. A float switch that trips repeatedly indicates persistent condensate problems—your technician can assess pan condition, trap integrity, and line routing to prevent future shutdowns.
After the Fix: Keep Performance Strong
Post-repair, ask your technician for a simple maintenance plan and a record of readings such as temperature split, static pressure, and refrigerant values. These benchmarks help identify small deviations early next season. Good records, clean filters, and clear condensate lines are the foundations of a reliable cooling season.
FAQs
Q: My AC runs but the house is still warm. What should I check first? A: Verify mode and setpoint, replace the filter, open all vents, and inspect the outdoor unit for debris. If performance does not improve, schedule a diagnostic visit.
Q: The thermostat is calling for cooling but nothing happens. A: Check the furnace switch, breaker, and service door switch. If the system still does not start, an electrical component like a capacitor or contactor may have failed.
Q: Why does my system freeze up? A: Usually airflow problems or low refrigerant. Turn the system off, run the fan to thaw, and call a professional to prevent compressor damage.
Q: Can I add refrigerant myself? A: No. Refrigerant handling requires certification and specialized tools. Improper charging can damage equipment and reduce efficiency.
Q: How often should filters be changed? A: Every one to three months depending on filter type, household activity, and pets. Check monthly during peak summer.
Q: What if certain rooms never cool down? A: Have duct distribution evaluated. Simple balancing or return upgrades can correct stubborn hot spots.
Restore Comfort with Confidence
If your troubleshooting points to an issue beyond basic homeowner checks, schedule professional air conditioning repair. A trained technician can pinpoint the fault, perform a safe, lasting fix, and provide practical tips that keep your Skokie home cool and efficient all summer long.


